Building and installing the Linux kernel from source
The Linux kernel is at the core of the operating systems such as Ubuntu, CentOS, Redhat, etc. Since it is open source, it turns out to be very beneficial to students and enthusiasts who wish to explore the source code behind all the magic. The kernel has been written in C and C++. Building the kernel from source might seem like a daunting task at first but in reality it turns out to be a matter of few steps ( if everything goes well! ).
To begin, you’ll need the Ubuntu operating system installed on your machine ( at least to follow this article step by step ) or on a virtual machine. Running Ubuntu on a virtual machine is recommended as one may end up encountering compatibility issues with the hardware after installing a new kernel or might just simply commit mistakes during the installation process. However, it is not compulsory to run Ubuntu inside a virtual machine to follow this article. You may skip Section I below if you are not going to use a virtual machine.
Section I: A virtual independence
In case, if you have never heard of Ubuntu or virtual machines in general, please go ahead and simply download the non-commerical version of VMware on to your system. Presumably, you are running Windows or Mac OS on your system in the latter case. It is quite easy to get VMware installed on Windows or Linux. Mac OS users can use the VMware Fusion for a 30 days trial period.
Once you install VMware, you will need to download the Ubuntu’s ISO image file (installer) from here. Then,
- Run Vmware
- Click on “Create a New Virtual Machine”
- In the dialog box that appears, select the “Use ISO image” option and add the downloaded ISO file’s path.
- Next, enter a password for Ubuntu ( Do not forget this password! )
- Keep hitting “Next” until you see the option to choose the disk size. Set the “Maximum Disk Size” to at least about 200 GB. Then, click “Next”.
- Hit the “Customize Hardware…” button and allot the following recommended resources to the virtual machine:
-
Memory – 4 GB - Lower memory could cause issues while booting up a new kernel inside the virtual machine, depending on the kernel modules you end up installing
-
Processors – 4 to 8 - If you are not sure how many processing units/cores your machine supports, leave this to the default value
-
- Click “Finish”
Ubuntu should now get installed on a virtual machine ( basically an operating system inside an operating system ). You have now successfully set up a safe haven to turn into a mad scientist!
Section II: Feeding the Grub
Inside Ubuntu, open up a shell and enter the following command to see the current version of the Linux kernel that you are running.
uname -rTo run a new latest kernel, you will need to “build” it from source and install it into the /boot directory. Before doing that, we will need the option to choose a kernel during a system boot up so that you can revert back to using the older kernel if things turn ugly!
To enable it,
- Run the command, “sudo gedit /etc/default/grub”. Enter your password if necessary (will not be visible in the shell)
- Comment out the line (place a ‘#’ in front) “GRUB_HIDDEN_TIMEOUT=0” and save the file.
- Run the command, “sudo update-grub”
- Close the shell and restart Ubuntu.
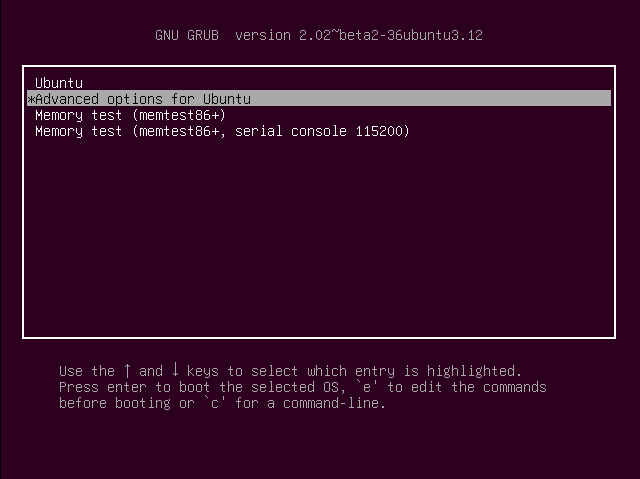
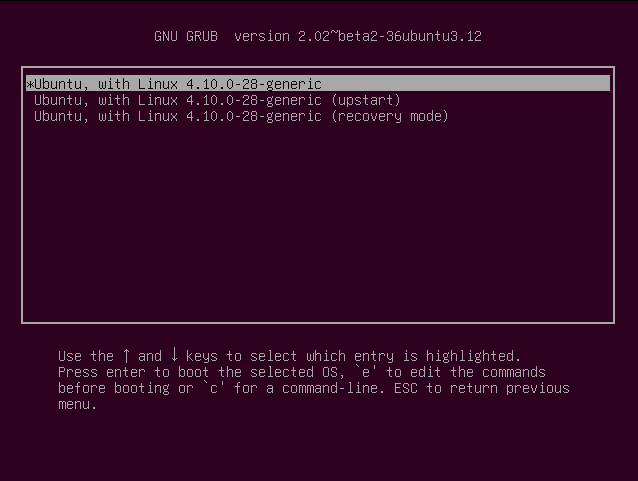
A list of options should show up now at the time of booting. The first option (Ubuntu) in the menu list will allow you to boot up Ubuntu with the already existing kernel. By selecting the “Advanced options for Ubuntu”, you’ll be able to see all the current kernels installed on your machine/virtual machine.
Section III: From a Kernel to Colonel of the hardware
To build a kernel from source and install it, you will need to do the following:
- Visit kernel.org
- Download the Latest Stable Kernel (At the time of writing this article, it was version 4.14.12)
- Right click on the compressed file and click “Extract here” to extract the source code. Extract it to a place of your choice.
- Open up a shell and run the following two commands:
sudo apt-get update
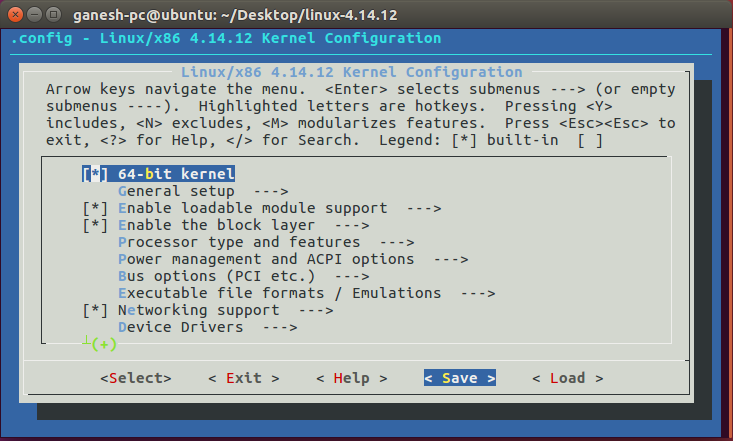
sudo apt-get install git fakeroot build-essential ncurses-dev xz-utils libssl-dev bc libelf-dev- Using the same shell, navigate to the location where you extracted the source and run the command, “make menuconfig”. You should now see a dialog menu pop up.
- Select “Save”, create a “.config” file and “Exit” the dialog box. Use arrow keys to navigate between options in the dialog box. The config file basically tells “make” ( something that will eventually build the kernel ) to choose the appropriate modules to be installed for the kernel - such as drivers and system tools.
- Then run the command, “make -j8”. The ‘make’ will now build the kernel from source. “-j8” refers to the number of processors you wish to assign for building the source code. “-j8” tells that we wish to use 8 cores. (Refer Section I to see how many processors you allotted to the virtual machine or run the command “nproc” ). The kernel source base is quite vast and it may take up to an hour or more on slower machines for the entire build process to finish. Assigning more processors will significantly speed up the process.
- Next, run the command, “sudo make modules_install -j8” followed by “sudo make install -j8”. These commands will install the new kernel at /boot.
- If everything goes well in step 7 and 8 you have got yourself a custom built Linux kernel. Congratulations!
- Pat your back and restart Ubuntu
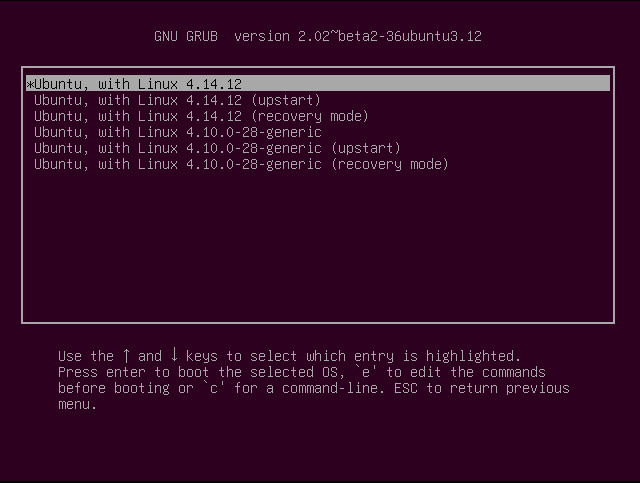
After restarting, check the list of available kernels, boot the latest kernel and Voilà!


